Category Archives: recipe

Beetroot and Carrot Salad

Beetroot and carrot salad

I used to think beetroots had to be cooked. Now I am wiser, I know they can be  raw. And may be more nutritious as a result.

Grating beetroots makes crunching effortless while an oil and vinegar dressing adds luxury. Carrots, also grated, are a perfect companion.

You know what they say: eat for colour: orange, reds (and more), each colour containing different immune-boosting nutrients.

I first came across the beetroot/carrot combo at the Better Food Cafe about seven years ago, and copied the idea, working out a version at home. 

IMG_9406

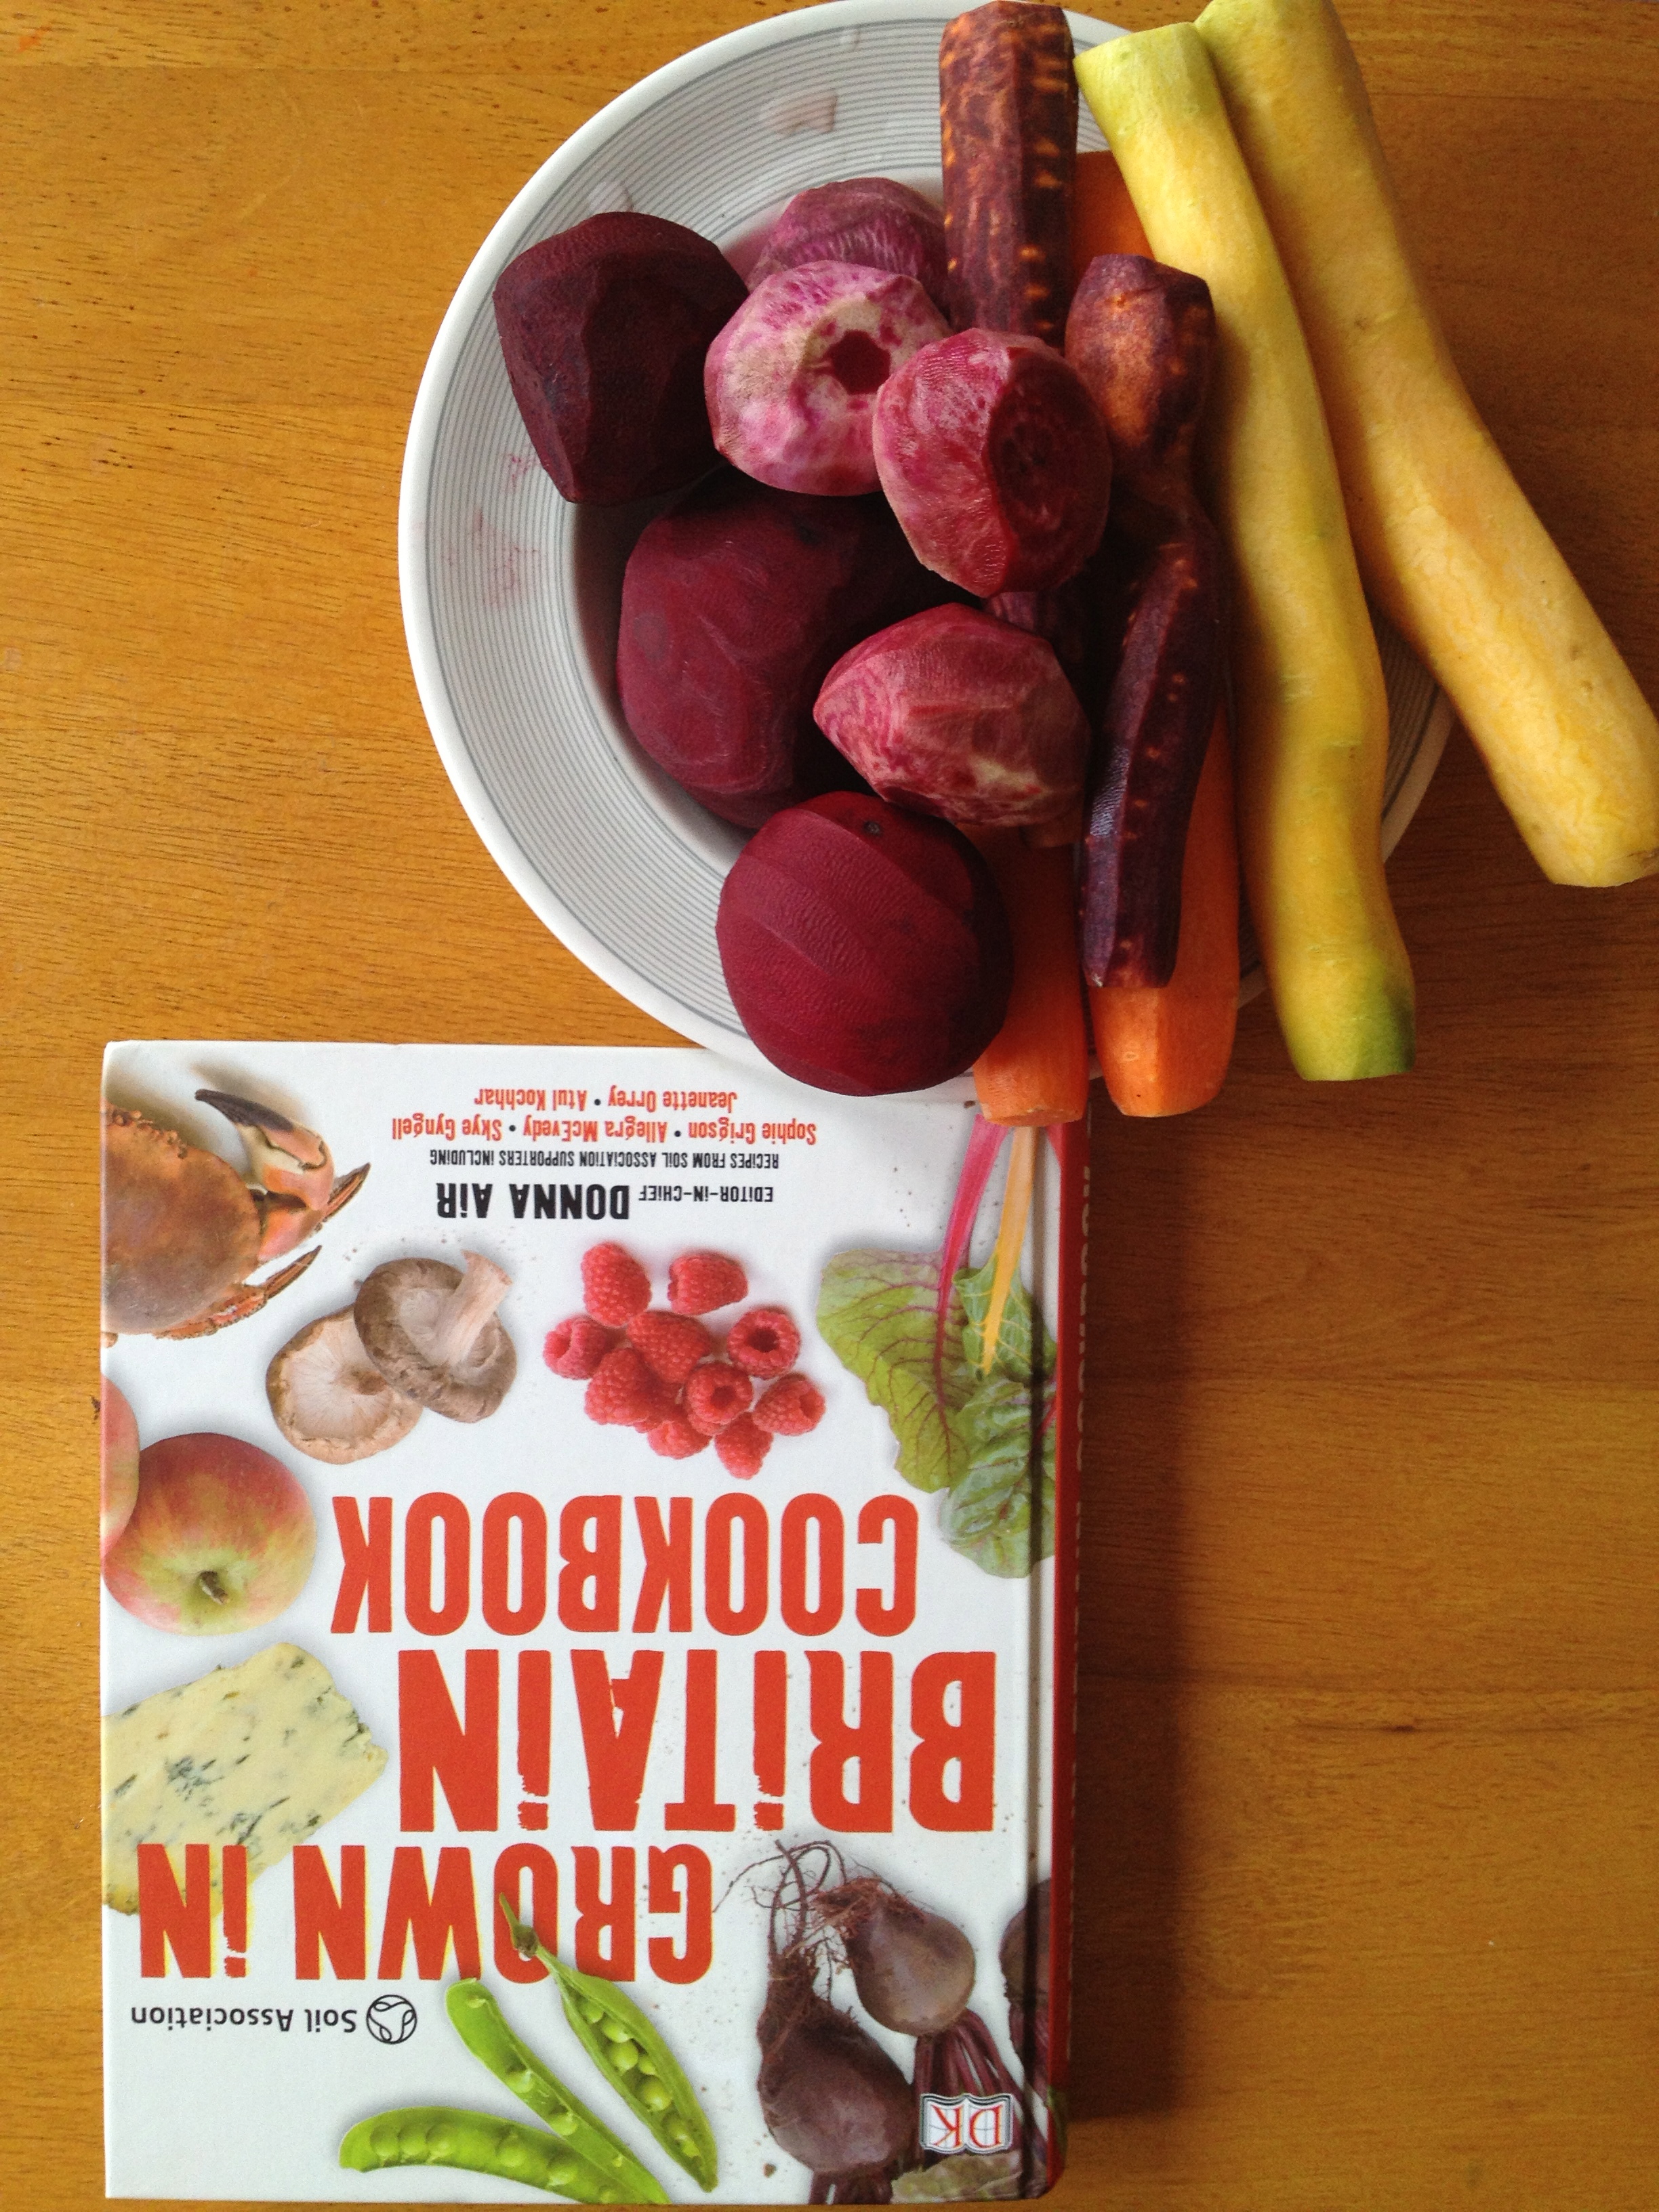
Then turned it into a recipe for Grown in Britain CookbookI wish I had name-checked my inspiration so glad to be doing so now. My beetroots came from  the Better Food Company, too.

IMG_9403

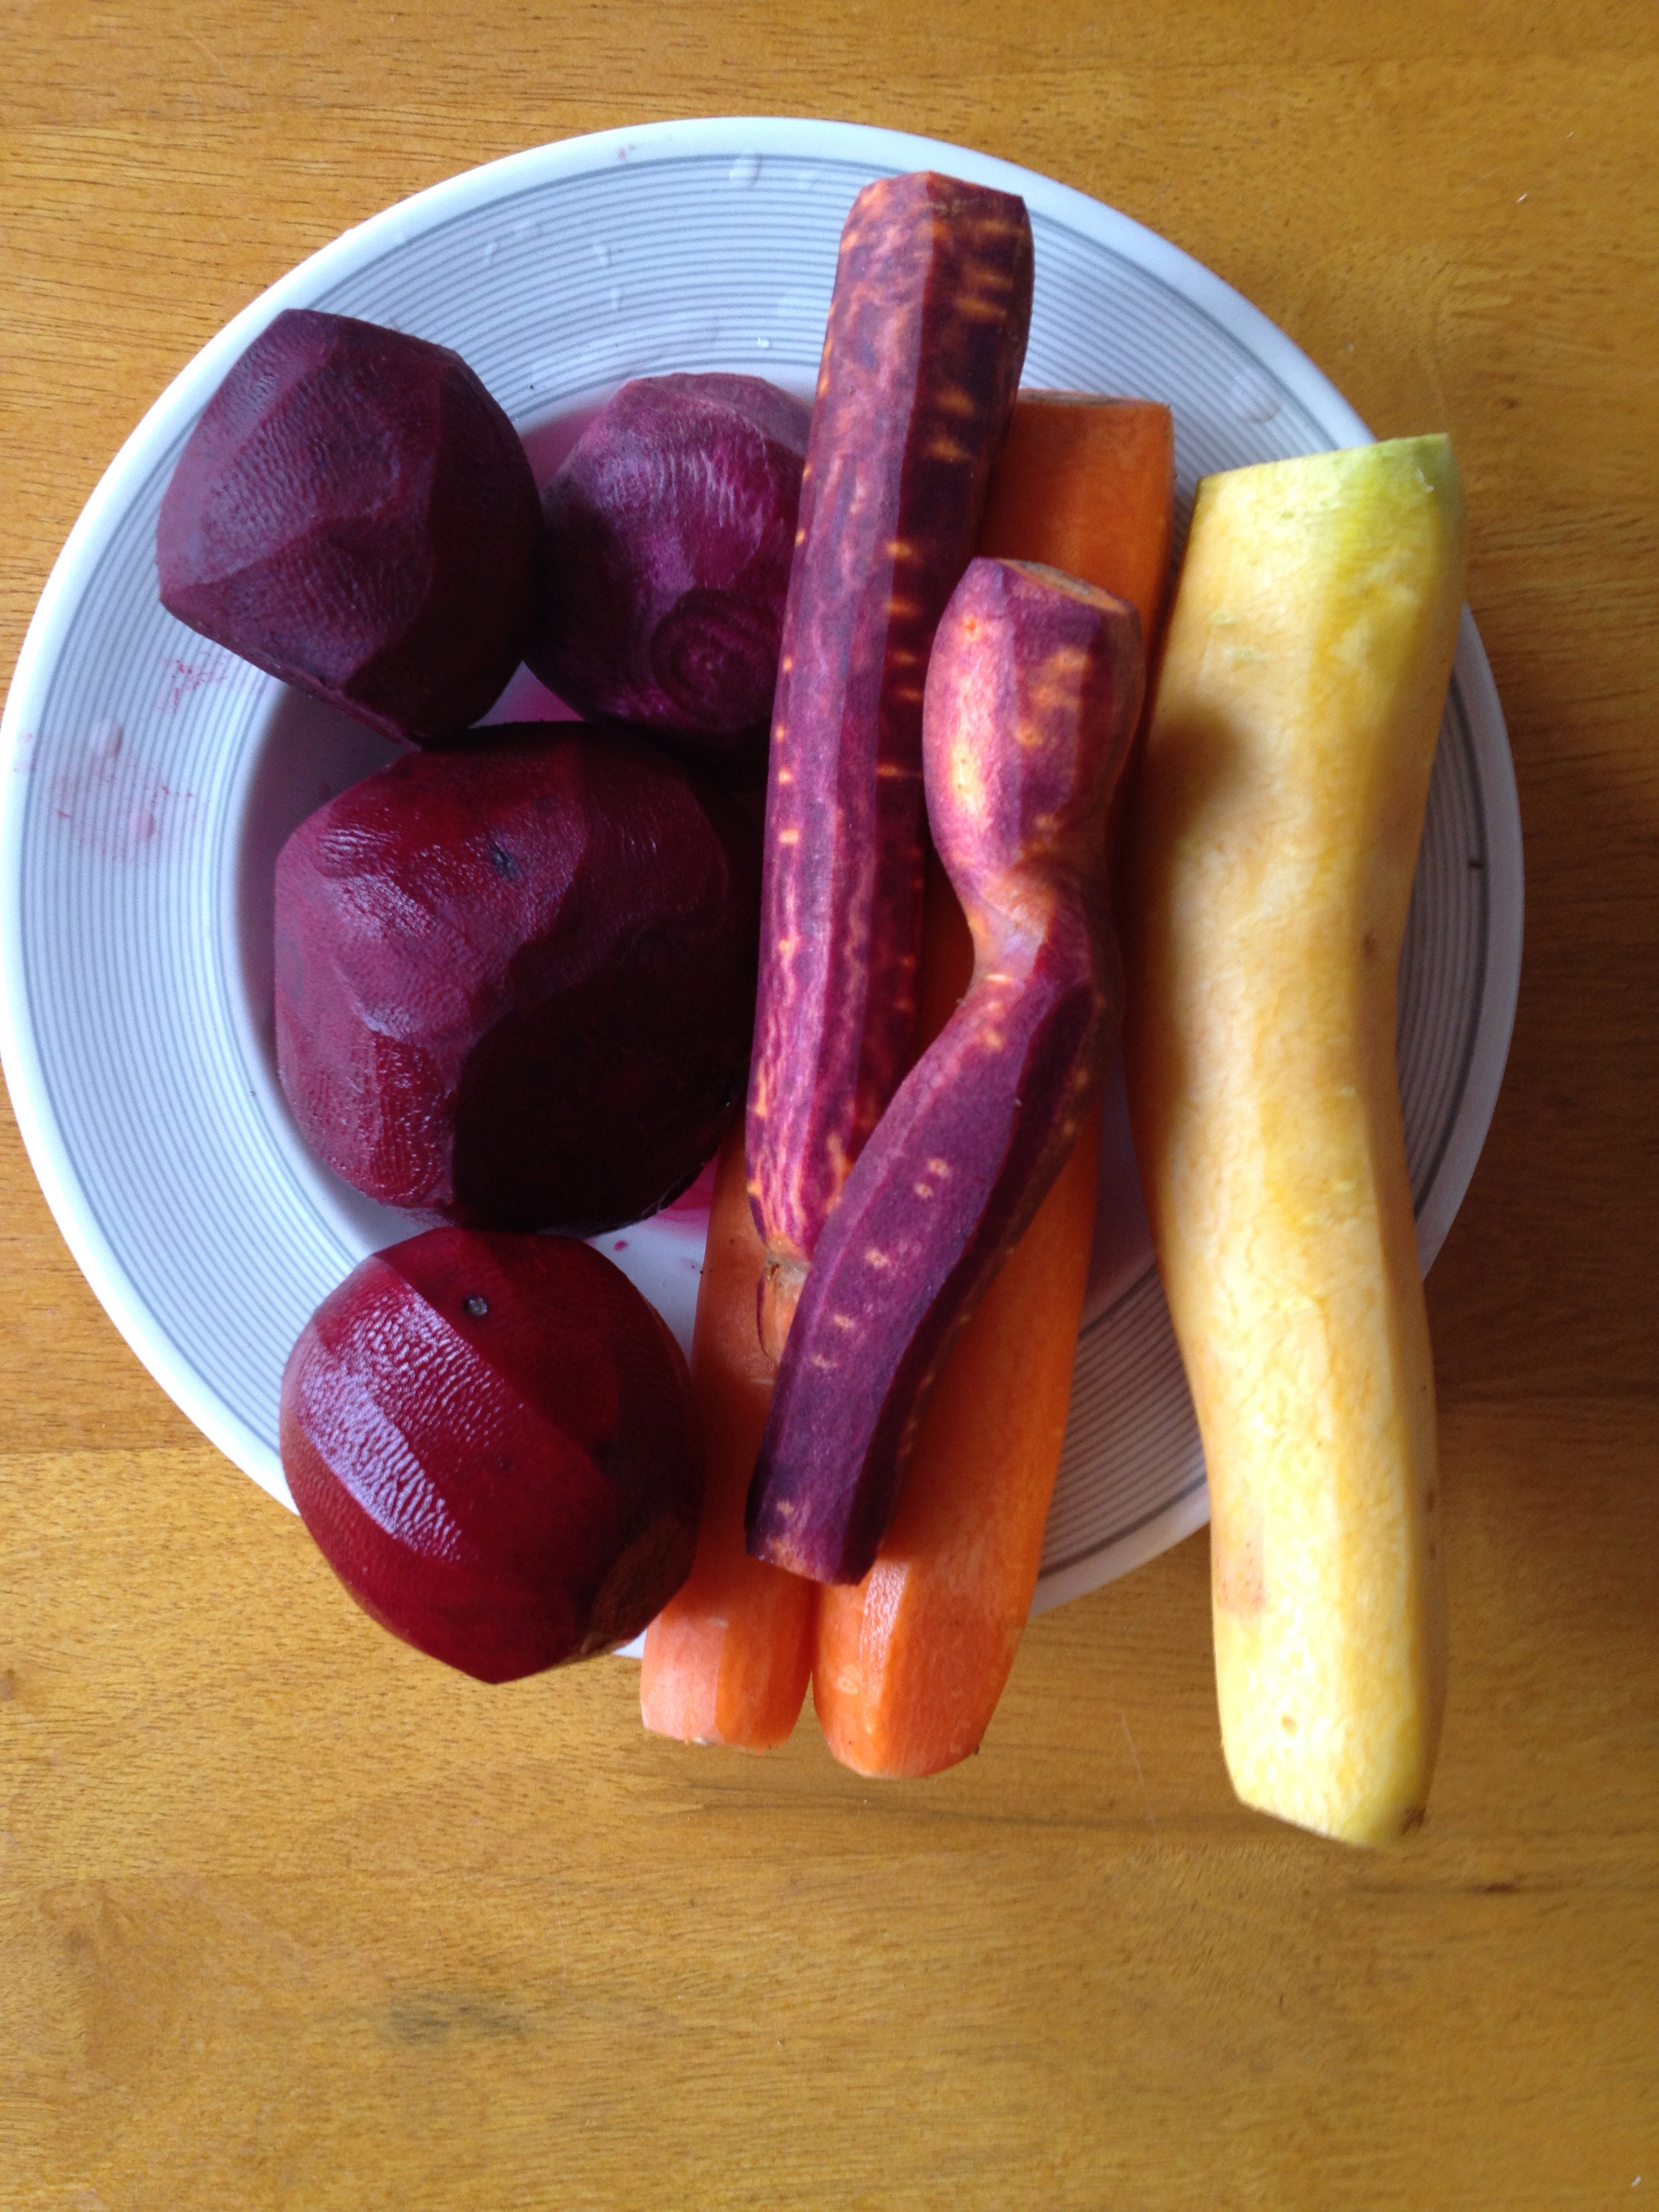
I peeled the carrots and beetroots, above. Grown organically, slowly, biologically, they are chemical-free and needed only scrubbing, plus the skin has nutrients. (But I am not perfect and peeling is faster).

I was taken with the yellow, white and purple carrots, as they used to be before 17th century Dutch growers went monoculture orange to praise William of Orange. Poetically, these 21st century rainbow carrots were grown in Holland.

Bear Fruit Bear Pit
I had bought my Dutch rainbow organic carrots at the Bear Fruit stall (above) in the Bear Pit, Bristol.

The Bear Pit is, by the way, an example of urban regeneration from the grass-roots-up. A dingy subway on a busy city roundabout now transformed by locals into a lively market and meeting place.

Beetroot and Carrot Salad – ingredients for four

  • 600g raw beetroot
  • 600g raw carrots
  • 50g sunflower seeds
  • Dressing: 4 tablespoon olive oil + 50ml balsamic vinegar
  • oil for frying/toasting + soy sauce for seeds
  • Salt and black pepper, to taste
  • Fresh herbs (parsley, coriander) or snipped salad cress.
  • 1.1. Scrub/peel carrots and beetroot, and trim tops and tails. Keep carrots whole for grating. Peel the beetroot and cut in half. Grate the raw vegetables, using hand grater or food processor. Combine in large bowl and add olive oil and vinegar dressing.2. If not serving immediately, don’t add dressing yet. Instead, store covered in fridge. Remove 1 hour before serving to bring to room temperature. Then add dressing (below).

    3. For the vinaigrette, put the oil and vinegar in a screw-top jar, put the lid on tightly and shake vigorously.

    4. Gently heat olive oil in a small frying pan and toast the seeds for 3–4 minutes over a moderate heat, stirring to prevent sticking. Add the soy sauce at the end of the cooking, if using. Most of the sauce will evaporate, leaving a salty taste and extra browning for the seeds. Store the toasted seeds in a jar with a lid if preparing the day before.

    5. When ready to serve, add the chopped herbs to the grated beetroot and carrot. Shake the screw-top jar with vinaigrette, then pour over the vegetables, and season to taste. Toss the salad gently until everything glistens. Scatter the toasted seeds.

Hello Kitty cake

Hello Kitty cake
It’s not often I go mainstream but basically my eldest daughter asked me to make a Hello Kitty cake for my granddaugher Tayda’s fourth birthday party in December (this blog is well-overdue) held at St Werburgh’s city farm.

A few days before I got baking, my eldest daughter had a nightmare about the cake-making.

I said: “Good. Prepare to be disappointed.”

I felt I had to manage expectations.

However, it turned out well. The cake tasted good and actually looked like Hello Kitty.

For the latter, I must thank the opportune arrival of my middle daughter who took over cake-decorating just as I was getting bored. She talked me down from “getting creative”, insisting we adhere to its original design.

So here’s the Hello Kitty birthday cake-making story plus recipes.

I started by looking online for a clear image I could print and trace.

I ended up on GirlyBubble, a website for “girlyness and cute stuff”. Yes, I was in alien territory but fearless in my quest for a clear image of Hello Kitty.

I printed the image and traced it by hand. I admired the clever simplicity of the design, neither round nor oval, and its trademark bow and whiskers.

I owe decoration-detail to Coolest Birthday Cakes where readers have submitted their Hello Kitty cake designs. How grateful am I to the web and its culture of sharing?

Then it was time for real-life cake-decoration shopping at my local sweet shop on the independent-tastic Gloucester Road  (one of the last independent high streets in the UK).

Scrumptiously Sweet is a traditional sweet shop offering attentive service and saintly patience as I agonised over icing tubes, jelly beans and marshmallow pipes.

Side-view of Hello Kitty

We used bootlace liquorice to outline Hello Kitty’s head and ears, her bow, whiskers and nose.

We squeezed out Dr Oetker Designer Icing to fill in the red of the bow.

And encircled the lower base of the cake with pink marshmallow Flumps (you can see the join in the pic below).

Hello Kitty cake

Hello Kitty Cake and Icing recipes

I owe everything to All Recipes.com and its Foolproof Sponge Cake. It is truly foolproof for I am the fool, and here is the proof.

I made two sponges, one square, one round.

IMG_8402

The deeper square one (above) was sliced through its middle and filled and covered with pink buttercream icing.

Hello Kitty "face"

The smaller sponge (above) was baked in a round flan tin, requiring only some trimming with a sharp knife to become Kitty-shaped. This sponge had white icing to contrast with its bigger pink base.

Recipe for Foolproof Sponge Cake

No need to cream butter and sugar. Instead, sieve the flour and mix in the other ingredients. I used organic ingredients for health of people and planet, and butter not marge. It seemed strange to cook a sponge for a whole hour – but it worked. Brilliantly.

Serves: 12

340g (12 oz) self-raising flour | 280g (10 oz) caster sugar | 280g (10 oz) butter (or margarine) | 5 eggs |3 tablespoons milk (or soya milk) |

1. Grease and line two 20cm (8 inch) square or round tins and set aside. I used an 8 inch square tin and an 8 inch round flan tin, and did not skimp on the greaseproof lining paper.

2. Pre-heat the oven to 150 C / Gas 2, or 140 C for fan ovens.

3. Sieve self-raising flour into a mixing bowl, add the sugar and butter, then the eggs. I used my electric hand-blender, adding one egg at a time, blending after each one, until all ingredients were amalgamated. Once blended, some extra fast whizzes. The result: a thickish smooth batter.

4. Pour into the tins, place in centre of oven and cook for about 1 hour 15 mins, to 1 hour 30 mins. All Recipes says test with skewer: if it comes out clean, the cake is done.

Thank you All Recipes.com. Now a huge big shout-out to HonieMummyBlog for Perfect Butter Icing – perfect indeed! – and a genius selection of different quantities. Again, gratitude.

Honnie Mummie Perfect Butter icing

250 g / 8 oz butter | 500 g / 1 lb icing sugar | 4 teaspoons milk

For base (not Hello Kitty face), we carefully added drop-by-drop red colouring for a pinky effect, and mixed before adding the next drop.

I made the cakes on the Thursday, the butter icing on Friday, and assembled it all on Saturday – party day. 

And did not disgrace my family.

IMG_8426

Here is the cake nibbled down to its essential Hello Kitty-ness.

And here’s a under-1-minute video of the cake at Tayda’s party.

Katie Stewart: Marmalade 2013

Photo shoot in snow

Oranges snow today

The cookery writer, Katie Stewart, died earlier this month.

There was an outpouring on Twitter from those including me who had learned to cook from her cookbooks.

Then Guardian food and wine writer, Fiona Beckett, suggested a Katie Cook (#katiestewart) day and others on Twitter took up the call, followed by Alex Renton in The Times. This is my contribution.

I have been following Katie Stewart’s helpful, practical recipe for making chunky marmalade since 1980 from The Times Calendar Cookbook. Having decreased  sugar bit by bit, I now use less sugar than fruit.

Katie’s original amounts: 3 lbs/ 1.1/4 kg Seville oranges | 6lbs / 2.3/4 kg sugar | 5 pts/ 2.3/4 litres water | juice of 2 lemons.

I use organic Seville oranges. They cost twice as much this year as non-organic ones because we live in a nutty world where wholesome food is more expensive than junk food. Still, added expense worth it because:

  1. Organic oranges have more pronounced taste because they are smaller and denser (basically less watery) than non-organic oranges
  2. More nutrients in organic too: “conventional farmers (drive) down nutrient levels via their pursuit of ever-higher yields,” says Charles M. Benbrook
  3. By paying the extra, I am doing my bit for healthier soils and water, and feeding the world. Think of it as a charity donation.

Talking of which, Katie Stewart’s family has asked for donations (rather than flowers) for The Kids’ Cookery School. The charity’s mission is to give every child in the UK an unique fun cooking experience to help them make informed choices about food. You can donate online.

My marmalade 2001 blog post talks about the young US soldier, Bradley Manning, Wikileaks whistleblower. Currently in pre-trial court martial proceedings, on Thursday he was refused the whistleblower’s defence: motive.

The marmalade: Katie Stewart’s recipe for Chunky Seville Marmalade, her invaluable tips, my amounts and spin on my Marmalade 2011. Apologies not metric – any help with converting amounts welcome.

Marmalade 

5lbs organic Seville oranges

4 lbs organic cane sugar

2 lemons

4 pts of water + 1 pt for extracting pectin

Top Katie Tips

  • Place a few saucers in freezer so boiling jam can cool quickly when testing to see it has set
  • Put weighed sugar in a preserving pan in low oven to warm
  • Clean jars thoroughly with hot water and dry them in oven
  • Add lemons at preserving pan stage.

Five stages of making marmalade

1. Clean oranges + simmer to soften
Washing oranges

Scrub non-organic oranges and remove stalks. Cook in a large pan or two smaller ones – with lids – in 4 pints of water and simmer heartily for about an hour until peel is soft. Orangey aroma fills room…

Drain cooked whole oranges and preserve cooking water as if it were a precious liquid (it is).

This process can be done earlier, or even the day before.

2. Extracting pith and pips for pectin

Pith and pips

Pith and pips (left)

Pectin, extracted from the insides of the fruit, is the setting agent. Cut cooked-and-cooled oranges in half. Scoop out with spoon the oranges’ insides – the pith and pips (pith and pips pith and pips – say it quickly) .

Add pith and pips to large pan with the 1 extra pint of water. Simmer for ten minutes then drain: this pectin-rich liquid will help jam set in Stage 4.

3. Slicing peel 
Slicing peel
Flatten softened peel with your hand, and cut up peel of oranges (and lemons), thinly or thickly, as you like.

4. Sugar boiling drama 

Fast-boil for imminent set

Fast-boil for imminent set

Add the sugar (warmed from the oven) to a preserving pan. Strongly suggest a preserving pan is good investment – otherwise use two of your widest pans.

Add the precious-liquid (stage 1), drained pectin-juice (stage 2), and cut-up peel (stage 3) in with sugar in preserving pan. Start boiling…

You must not overboil or you can lose that magic-setting moment. It really is as terrifying as it sounds. But you know what they say: the other side of fear is excitement.

It takes about 20-30 minutes to get it to boiling temperature and then you have to watch it like a hawk.

Start timing your 15-20 minutes when the jam is boiling like mad i.e. not just bubbling but when liquid goes into a furious fast-boiling glucky whirl – then start timing those 15-20 minutes.

So, after 15 minutes, take the pan off the heat and drop some hot jam on one of those icy-cold plates.

Let jam-droplet cool, tilting plate to encourage cooling, then push droplet gently with your finger. You are looking for tell-tale wrinkles and jelly-like character. (The opposite of an ideal lover? My 2011 joke).

If droplet is still runny, carry on boiling the big pan for a few minutes then test again. And so on.

Stage 5. Marmalade in jars

cooling marmalade

The marmalade droplets are now unequivocally set. Let jam cool in pan until not-too-hot nor too-set for pouring . Next, the sticky bit. Use newspaper to cover kitchen surface, use a ladle or a small cup. Good luck.

Recipes say use waxed discs to keep out condensation and mould but, cutting-corners-cook that I am, I have not not done so for years, with no adverse effects. Wipe jars from stickiness and proudly label.

Marmalade in jars

Katie Stewart: Pots de Crème au Chocolat (chocolate pots)

Spring vegetables Petersham Nurseries Katie Stewart book

Yesterday I received an email from the Guild of Food Writers with sad news: the cookery writer, Katie Stewart, had died.

“…a long-time Guild member and the recipient of our 2008 Lifetime Achievement Award. Katie was taken ill on Friday and died on Saturday” said the email.

My mum gave me The Times Calendar Cookbook (my edition published 1976) and I have used it since the 1980s. I also had the privilege of meeting Katie Stewart when she received her Guild of Food Writers’ Lifetime Achievement Award in 2008.

I tweeted the sad news, and soon there was an outpouring of tweet messages from fellow food writers who, like me, had learnt to cook thanks to Katie Stewart.

I believe generosity of spirit, and the heartfelt desire to communicate and share, really does transmit, to create classic cookbooks.

Yesterday Fiona Beckett, Guardian food writer, suggested on Twitter we have a day/weekend when we cook one of Katie’s recipes. What a great idea. More and more food writers thought so too. (Wow. Social media in action. Love it!).

I suggested we have a #katiestewart hashtag, and explained why at my other blog.

Alex Renton, The Times food writer got in touch. He is doing an obituary piece in Thursday’s edition for Katie, who was The Times cookery columnist.

He did not have a Katie recipe, so I offered to write one down.

I know the page number for pot au chocolate – page 77 – by heart.

My additions in brackets.

Pots de Crème au Chocolat

6oz/175g chocolate chips or plain chocolate broken in pieces

1/2 pint/3 dl. (300 ml single cream)

1 egg

pinch salt

1/2 teaspoon vanilla essence (optional)

Katie says: ‘Put the chocolate in the globlet of a blender. Heat the cream until just under boiling point, then pour on to the chocolate. Cover, switch on and blend until smooth. The heat of the cream will melt the chocolate. Add the egg, salt and vanilla essence and blend again quickly. The mixture at this stage will be quite thin. Pour into six small individual pots, or failing this, small glasses. Chill for several hours or overnight until the mixture is quite firm. Serves 6

Katie Stewart pot au chocolat

As you will see from my pic, I have played with this recipe over the years, and in 2012, made a raw chocolate version with chilli and orange zest.

Her book, The Times Calendar Cookbook, follows, without fanfare, seasonality: “Fruit, vegetables, meat, fish and game mature according to the seasons and over the year offer us a wide variety of fresh foods to use in recipes,” writes Katie Stewart in her introduction.

The pic of spring vegetables (heading up this blog) is a photograph from the book illustrating May. The vegetables come from Petersham Nurseries, still going strong.

I fear I am jumping the gun a bit because our #katiestewart, or Katie Cook Day as Alex coined it, is really at the weekend.

So please, please all fellow Katie Stewart fans near and far – get cooking at the weekend, share your recipe and…pass it on!

God bless Katie Stewart. What a life-enhancing legacy.

May her soul rest at peace.

Kedgeree

I ask Nadia over. Our plan: to make a video of cooking kedgeree, then scoff it convivially.

We assemble the ingredients, position Nadia at the cooker and I film the three-minute video on my iPhone without a script.

I like it fast and real, like my food.

According to Wikipedia, kedgeree ‘consists of cooked, flaked fish (sometimes smoked haddock), boiled rice, parsley, hard-boiled eggs, curry powder, butter or cream and occasionally sultanas’.

We use Organico Nerone (black) rice, into which, once cooked, we stir 1 tsp curry powder, quartered organic hard-boiled eggs, chopped dates, Fish4Ever peppered mackerel then lemon juice + chopped parsley.

We concoct curry powder with ground spices. Recipe for future ref: 4 tsp coriander + 2 tsp turmeric + 2 tsp chilli + 1 tsp ginger + 1 tsp mustard seed + 2 tsp cinnamon + 8 single cloves. We only use 1 tsp of this mix in the kedgeree. Would be wrong to overpower the rest of the ingredients…

No sultanas but miraculously I have dates, softening in water. We decide 8 cut-up small ones are fine. No butter because the fish is canned in plenty of organic sunflower oil. (I hope this encourages you to experiment when cooking).

Before Nadia arrives, I hard-boil eggs.  Note to self: try 3 next time.

I boil the rice.

250 g Organico Nerone rice simmers for 40 mins in 800 ml water. A whole grain, cook black rice as if brown rice: 1 cup of rice for 2 of water.

Listen, sometimes cooking is guess-work. Jamie Oliver uses 170g of long-grain rice for his kedgeree recipe but give no quantities of water. Water has to cover the rice generously because rice swells.

Amounts-wise, I’m a bit hit-and-miss. (Gad, how I hate reading posts like this when desperately seeking a recipe. Sorry). How do you cook your rice?

STOP PRESS: After saying on Twitter that I could not find a classic kedgeree recipe online, chef James McIntosh blogged this one! Fresh!

I was dying to try Organico Nerone rice. Known as ‘forbidden rice’, it did not disappoint. Dramatically black, the cooked grains are fragrant, dense and vibrant.

A speciality grain, it is grown only in parts of the Po valley. Charles Redfern, Organico’s founder and MD, is rightly proud of his artisan suppliers – Organico Nerone rice is cultivated and packed by the Picco family, growing it since 1878.

Organico Nerone rice recently won two stars in the 2012 Great Taste Awards. “Two stars = faultless” according to the Great Taste Awards.

Declaring interests, Organico and its sister company Fish4Ever are clients. I only promote what is Winkle-tastic real food. And I did the video just-for-the-love-of-it.

Fish4Ever, the world’s first sustainable canned fish brand, is store-cupboard convenience with a conscience. In organic world, everything is connected. Fish4Ever’s eco-practices include supporting local day boats, artisan fishing and local canning, and 100% organic land ingredients. The result? Quality fish. It’s a virtuous circle.

Here’s me eating it. Yup, I overcooked the rice a bit. And still, utterly delicious.

Black rice kedgeree served with grated carrots

And here it is, served the next day.

Keepers: Creamed coconut rice and raw vegetable marinade

Recently two recipes have entered my cooking repertoire. Both vegan (as it happens) they complement each other (as it happens). I want to record them with credits.

Creamed coconut rice

Step up, Claire Milne, the leading light behind the No Tesco in Stokes Croft campaign (and compadre), and the genius who came up with the easiest way to make the best coconut rice ever.

To cooked brown rice, add creamed coconut, cut small so it melts easily, and hey presto: soothing, luxurious coconut rice.

For 8 people: 3 mugs of rice for 6 mugs of water (how to cook brown rice here), 1 creamed coconut block (200g) cut in small pieces. (correction on rice proportions thanks for comment below).

(Experiment with adding cooked lentils, squash fried in small cubes, fresh herbs etc.).

Raw vegetable marinade

Step up,  Julia Guest. A filmmaker who made Letter To The Prime Minister in Bagdad during the bombing, in Fallujah during the occupation.

Julia’s current film, In Her Own Image, is an exploration of female divinity – in response to the war in Iraq as she explains at Indiegogo (where you can crowd-source/support the film). 

Anyway, food – where was I?

Raw vegetable marinade

A marinade is a sauce in which you soak your raw food (usually before cooking but in this case, no cooking required).

Which vegetables can you eat raw? Certainly not potatoes.  More info on raw food here.

I ate sliced mushroom, grated courgette, matchsticks of beetroot.

Choose veg you usually eat raw such as tomatoes, cucumber, radish, but think of others such as carrot or cabbage.

Sliver or slice or grate or anyway cut nice and slim.

Superfood dressing: tamari and cider vinegar and olive oil in equal proportions.

The marinade helps digestion of the vegetables.

Let the sliced veg soak in the dressing for a couple of hours before serving.

Would go well with the creamed coconut rice.

Image

Black Forest gateau – no flour, no butter, no sugar

I was detailed to make Black Forest gateau for our family feasting on Christmas day.

I had a plan: to substitute the flour with ground almonds.

Christmas eve 8 pm. Omigod. Scoured cupboards: no ground almonds. Damn.

(My canary-like constitution cannot take the much-hybridised wheat, hence my desire to avoid it.)

However: necessity is the mother of invention (Love a good cliché).

I found this recipe for Black Forest gateau without flour – bless you La Creme, Port Talbot, which uses cocoa instead of flour.

By some miracle, I had gone mad in Wild Oats  – with its far-out irresistible ingredients – and bought raw organic cocoa from Choc Chick and organic agave nectar that very day.

(Life is an experiment. This blog is too: I was experimenting writing it on my phone and hoopla, it published without my say-so.)

So, Christmas eve and I was experimenting. Exchanging flour for cocoa, and the sugar for agave nectar (which is low GI but make sure the agave is organic, otherwise the processing robs it of its nutrients and is bad for the soil too).

I paced around, thinking. Researched on the web.

I had to do lots of calculations – cups into grammes, grammes into ounces – which hurt my poor discalculiac head. Of course children should learn to cook at school. Maths in action. Useful maths. The kind of maths you actually need in real life.

Finally (10.30 pm), I knew I could procrastinate no more.

There are key moments in cooking. Such as commitment.

I broke the eggs. No turning back now.

Here is what I did.

Cake ingredients: 8 organic eggs + two-thirds of a cup (150 mls) of organic agave nectar  + 90g of raw organic cocoa.

(I used one less egg than in the original recipe because agave nectar requires reducing liquid by 1 fluid ounce i.e. one egg). (The recipes said: 2/3. Well, I can tell you, that is NOT 2-3 cups but TWO-THIRDS…slight difference…).

1. Crack and separate the eggs:  yolks in one bowl and whites in another. (And never the twain shall meet – until they have been whisked, separately).

2. Whisk the egg yolks until creamy and mousse-like.

3. Sift the cocoa into the creamy egg yolks. Fold in with a large tablespoon without stirring (folding helps guard the bubbles you have worked so hard to create).

4. Whisk the egg whites until they form stiff peaks.

5. Fold those egg whites into the egg yolk+cocoa mixture, carefully, a third at a time, in a under-and-over circular movement so not to batter your bubbles.

6. Heat the oven to 180 / Gas Mark 4 . Cooking with agave? Reduce temperature a bit and slightly lengthen cooking time.

7. Prepare baking tins. I used these wondrous Victoria Surprise ones from Lakeland. But two or three ordinary sponge cake tins will do. And they ARE worth lining and greasing with greaseproof paper. You will say thank you when the cakes emerge easily.

8. Spoon in the mixture into lined tins.

9. Bake for about 15 – 20 minutes. Note: cakes using agave nectar brown more easily so cover the cakes loosely with aluminium foil while baking.

10. Filling: stir together 200g organic half-cream fraiche + drained (no-sugar organic Demeter-certified) sour cherries  + grated (or grind in a nut grinder) dark organic chocolate. Tip: if all else fails, Just Make The Filling – light, fruity, delicious.

11. When cakes are cooled, spread the filling between the layers. Assemble the night before so the juices can sink into the cake and moisten.

Creme fraiche is less rich than cream but worry not, o indulgent ones: we used whipped cream for the topping.

And the cake was delicious.

Pecan banana bread made with ground nuts not flour

Banana bread + organic creme fraiche + Better Food Spicy Apple and Citrus Preserve

Experiment: Spoke a first draft instead of writing it. Took me five minutes. Could this be the way forward?

Here is what I said (with few amends).

Due to a delicate digestion, I think a lot about how I feel after what I have eaten.

The food is delicious. But how does it sit in my gut?

So I was interested to read in Natural Lifestyle an article by nutritionist Christine Bailey about healing the inflamed gut. A new idea. Is it possible?

The article recommended homemade yogurt (I am a believer), and well-cooked vegetables with meat broth, avoiding all grains.

The article gave a recipe for banana bread using ground pecan nuts instead of flour. No sugar. Honey instead.

Finding-out how to grind the nuts was a mission.

I even bought a new hand blender. I drove myself and the assistant at Kitchens mad questioning the nut-grinding function of every machine and found all nuts when ground eventually go to a paste because of the heat.

So it seemed nut-grinding might be a Shangri-La illusion.

So I bought my £30 Philips hand blender with a grinding attachment and further research found freezing the nuts might stop them getting too oily too fast.

I froze the nuts. I used the nut blender attachment, I found with short burts and not expecting too much fineness, I ground the nuts. It worked.

Pecan nuts are more expensive than flour. Nuts are more expensive than flour.

Here is Christine Bailey‘s recipe. I changed it: got rid of the baking agents, using eggs to make it rise, and two bananas instead of one. It filled one small and one big loaf tin. You could substitute the pecans for other ground nuts.

Grind/blend 10 1/2 oz (300g) frozen pecan nuts. A cinnamon stick adds grit to oily nuts. Add 2 tsp ground cinnamon to ground nuts. Whizz four eggs until airy then whizz with two tablespoons of olive oil (I used melted ghee butter) and one large or two small ripe banana until airy and smooth. Combine gently with nuts and cinnamon. Pour into two oiled loaf tins. Bake 180C Gas Mark 4 for 40 minutes until firm to touch. 

The banana bread tasted a bit worthy and I did go non-vegan spreading it with organic butter.

It must be noted, it was easy to eat, not sickly-eating sweetness

and afterwards my gut felt good.

It would not have been so happy with the grain.

The banana bread is a keeper but it does need a spread and I wonder what you might add to luxuriate the baked bread.

And have you grappled with nut-grinding?

Stokes Croft Tesco opens and butter bean salad


It’s hard to be happy about the 41st Tesco opening in Bristol (figure according to Tesco’s store locator).

93% of 500 locals surveyed had said No to Tesco’s in Stokes Croft. After over a year’s campaigning, it was bitter to see Bristol City Council bow to Tesco pressure last December.

Still, we are making the best of it.

On Friday 16 April, Tesco opened in Stokes Croft.

Friendly activists gave a Bristol-style welcome. They put a comfy sofa and lampshade outside on the pavement. Someone played a guitar.

Another strode into Tesco’s with a wad of Monopoly money. When he was not allowed to spend it, he tried to bribe a security guard with it.

A woman passer-by who also objected to Tesco’s monopoly, took up the Monopoly money-action.

On Saturday, a performer (see pic above) invited us in to ‘his’ Tesco, while outside on the pavement, stalls served free food, and promoted Picton Street’s local independent shops, in the street behind the dreaded Tesco.

Picton Street is a marvel, and includes the Bristolian Cafe, Yogasara yoga studio, vintage dress shops, an art gallery, Radford Mill organic farm shop and Licata, the family-owned Italian delicatessen.

Licata often has great bargains in olive oil and tins of beans. I am crazy about beans as they are a wonderful source of health. Licata has many variety of tinned beans, which to me = fast food.

I owe everything I know about beans to vegetarian hero, Rose Elliot. The Bean Book changed my eating habits for life.

The following recipe comes from there. Please consult The Bean Book for measurements, nutritional facts and top inventive recipes using dried beans and pulses.

Here is my sloppy fast-food version.

Gently fry sliced fresh mushrooms in (olive) oil so they are still succulent. Add a tin of drained butter beans and warm with the mushrooms. Add lemon juice squeezed from two lemons and chopped fresh herbs such as parsley or coriander. You can’t have too many fresh herbs so over-estimate. Mix it all in the frying pan, with salt to taste, and serve still warm with brown rice, or cold as a salad.

I used organic ingredients from Better Food organic supermarket, a 20-minute walk away from Tesco’s, and land cress as the fresh herb.

Rose Elliot’s recipe fries fresh cut-up garlic with the mushrooms and adds cumin spice, with coriander as the fresh herb.

PS I met a neighbour on Saturday who said she had to buy something at Tesco’s in Stokes Croft, and I am haunted by her anxious look.

So, just so you know: If it makes life easier to shop there, then do. Life’s too short for guilt and sacrifice.

I am not against people who use Tesco. I am against Tesco.

Fay’s fish soup with fennel

My mother is the original Real Food Lover. She says the original Real Food Lover was her mother. Because this is how we learn about food: from the people close to us.

My mum always says the best education you can give a child is to educate the palate.

My mum bought this hake the day before at Tachbrook Street market, Victoria, where my dad used to be a one-man GP.

Here is a link to a video of my mum explaining to my eldest daughter how to make fish soup.

It starts with the drama of stopping the fishmonger from throwing away fish-heads:

“‘I’ll have the head!'” she cries. “He was going to throw it into the bin,” she says, with disbelief.

My mum makes the stock from the (rescued) sea bass head and its bones, the head from the large hake from whence come the cutlets, as well as prawn shells.

She adds bay leaf and peppercorns, with just enough water to cover, and cooks it for twenty minutes, with the lid on.

Here is a video of my mum agonising over how much water she used and describing the importance of a lid.

She remembers the way her mother cooked:

“Now, my mother used to tilt the lid – her soups were never watery…But I don’t trust myself.”

While the stock is simmering, she sweats the fennel and leeks in olive oil.

After twenty minutes, she drains the stock, keeping the liquid, to which she adds quartered potatoes and a pinch of saffron which gives the soup the yellow-colour, and a delicate aroma.

Here are the drained remains of the fish head and bones after they have yielded their flavour to the liquid stock.

Fay pours the stock over the vegetables and cooks until tender but “not too tender,” she adds.

When she is ready to serve, she removes the vegetables with a slotted spoon.

Here are the saffron-coloured vegetables, removed temporarily from the saucepan.

Then Fay heats the stock and adds the fish.

You must never cook the fish too long.

According to my mum, her mother “used to scream down the ‘phone: “Don’t cook it too long.'”

What is too long?

What? You want measurements?

As my mum says: “Nothing is made to measure.”

Basically, as soon as the fish starts to gently flake, you take the fish off the heat.

It all depends on the thickness of the fillet, or, in this case, the hake cutlets. Five to ten minutes?

Here is my eldest daughter scooping out the rouille my mum made.

“You know how to make rouille?” My mother asks my eldest daughter.

With garlic, cloves and red chilli pepper – I’d better check that.

Geraldine  (added after publication) gives rouille recipe:

“The rouille will be made with crushed cloves of garlic and red chilli pepper, and mashed as you say into a paste made of stock soaked bread (instead of egg yolks).”

Fay adds bread soaked in the fish stock, then carefully drips-and-whirrs olive oil to make a mayonnaise.

And you don’t just eat the meal. You have to analyse it in detail.

My mum remembers her parents discussing the make-up of every dish back in the 1930s.

And here we are, in the 21st century, still doing it.