Jamie’s raw chocolate cake for Pete

In memoriam

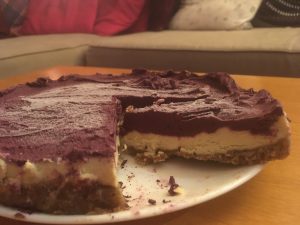
Raw chocolate cake with slices showing three distinct layers
Homemade raw chocolate cake (Image: Elisabeth Winkler 2020)

There was a beautiful memorial for Pete in January 2020, Bristol funky-style with meaningful words and amazing live music. Everyone bought a dish.

Afterwards, someone posted on the shared Whatsapp:
“Can anyone help with a recipe? My friend with me said she had some chocolate cake that was amazing “possibly flourless with a figgy dense filling. The choc was bitter sweet”. Could we have the recipe?”

That describes it exactly: flourless, figgy, sense.

I have been meaning to post the recipe and pics ever since.
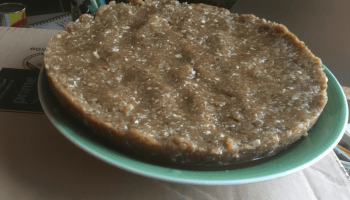
Round base of cocoa oily nuttiness made by hand
Base of raw chocolate cake
Image: Elisabeth Winkler 2020

Jamie Oliver raw chocolate cake – my simplified version

Raw cakes are great but you need electrical kitchen tools such as a food processor.

Base

  • 60g organic cacao butter
  • 150g hazelnuts or any nuts to hand
  • 3 Tablespoons cacao powder
  • 1½ Tablespoons honey

Filling

  • 300g pecan nuts
  • 150g dates (de-stoned)
  • 150g dried figs
  • 3 Tablespoons honey
  • 5 Tablespoons cacao powder (see note)
  • 1½ teaspoons vanilla extract.

Icing

  • 200g coconut oil
  • 120g cacao powder
  • 2 teaspoons organic dark agave nectar or honey.

Instructions

  1. Line a 20cm springform cake tin with greaseproof paper.
  2. To make the base, shave the cacao butter very finely into a small bowl, then place in a large bowl of hot water and allow to melt (it melts at about 34ºC, so is still considered raw).
  3. Base (cont.): Blitz the hazelnuts in a food processor or nut grinder until fine, combine with the other base ingredients and press into the tin. Chill while you make the filling.
  4. Filling: Blitz the pecan nuts until fine, then add the remaining ingredients (remember to de-stone the dates) and blitz until everything comes together. Press into the tin and chill for at least 3 hours.
  5. Combine the icing ingredients and chill for about 20 minutes to set a little, stirring once or twice.
  6. Run a round-bladed knife around the edge of the cake and remove from the tin.
  7. Spread the icing on the cake with a palette knife.
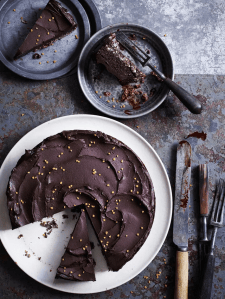
Dark chocolate cake taken from above. Two slices have been cut and are on two plates one with a fork. Looks delicious.

This image is not mine! It is Jamie Oliver’s. Thank you, Jamie! I once interviewed him in 2008 and I rate him.

Pete is much-missed. May his soul rest in peace.

Homemade hummus

Small bowl of hummus with a slice of lemon and a salad leaf

The secret to hummus lies in its ingredients.

Jump to hummus recipe

Forget cooked chickpeas in tin or jar. Using dried chickpeas from scratch makes all the difference.

A jar/tin of ready-cooked chickpeas is OK in a hurry BUT the texture will be more mushy.

Why use dried chickpeas from scratch?

  • They keep their shape
  • They have more nutrients than canned
  • They double in size
  • They are cheaper
  • and if you do not use them for hummus, they can be sprouted.

While the dried chickpeas are soaking in water (recipe below), let me tell you about The Bean Book by Rose Elliot. A life-changing cookery book, it introduced me (in the early ’80s) to the magic of beans and other pulses, one of the first crops humans grew. The dried seeds of pea-family plants (or legumes) are nutritional powerhouses.

A vegetarian cookery pioneer, Rose Elliot explains the art of mixing proteins from two different plant foods such as pulses/nuts/seeds/grains to get super-charged protein. Chickpeas (pulse) + sesame tahini (seed) equals protein-rich hummus. The raw garlic and lemon juice adds immune-boosting vitality.

Use organic ingredients if possible too. Farming which works with nature adds to the taste. Enriched with nature’s fertilisers (sun/compost/clover etc), organic soils are teeming with life so have a wider range of minerals/nutrients for the plants. Without chemical fertilisers, crops work a bit harder, producing more flavour compounds. Soluble chemical fertilisers (particularly nitrogen) make non-organic crops grow fast – but sappy. Organic produce has a lower water content. All this adds up to richer, more complex taste. Just a thought.

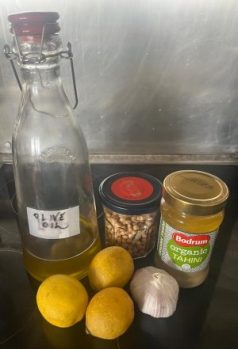
A clear bottle of extra virgin olive oil, dried chickpeas in a jar, jar of tahini (brand: Bodrum organic), 3 lemons and 1 bulb of garlic.
Hummus cast assembled from left clockwise: olive oil, chickpeas, tahini, garlic and lemons.

Hummus Recipe

Ingredients

  • 200g or 1 cup of dried chickpeas (or 400g of cooked chickpeas)
  • 1-3 lemons squeezed (about 4-6 tablespoons of juice)
  • 2-4 cloves of raw garlic, peeled (minced by hand if not using electric blender)
  • 4-6 tablespoons of olive oil
  • 4-6 tablespoons of tahini (ground roasted sesame seeds)
  • Salt and optional cumin to taste.

Cover about 200g of dried chickpeas with plenty of water so they have space to swell (swell. What a word).

Ideally you have access to an electric handblender or food processor. I use a Nutribullet. You could use a potato masher if doing it by hand. If so, ensure the garlic is well-crushed before adding.

The amounts of garlic and lemon juice depends on you. I use lots of both (three lemons and five garlic cloves). Ditto with olive oil and tahini. I have given guidelines so you can adjust accordingly.

Method

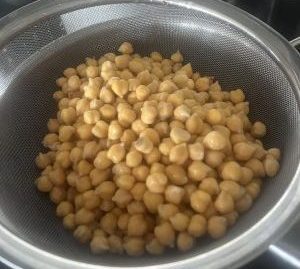
Start by soaking about 200g of the dried chickpeas in water overnight (or use boiling water and soak for about an hour until plumped up). Drain then add to a pan with fresh water, and simmer for about 45 minutes. Once cooked (soft enough to munch but not mushy), drain the chickpeas and let them cool down a bit.

Cooked chickpeas drained in a sieve over a pan
Draining chickpeas

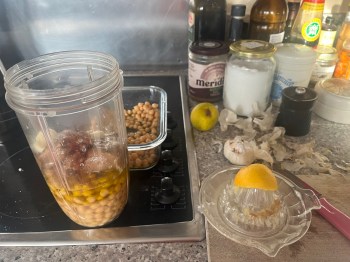
If using a Nutribullet, put the raw garlic in the goblet first with the oil and lemon juice so, when you turn the goblet upside down to whizz it, the blades can crunch down. Then add tahini and cooked chickpeas. Add salt/cumin to taste.

Above is a pic of kitchen chaos. No homemade hummus ever comes out the same, the mystery of homemade.

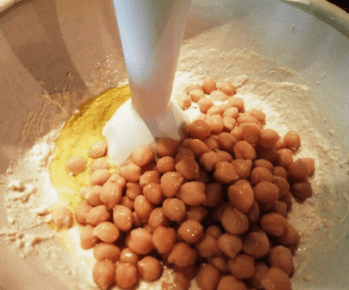
Blend until its consistency (above image with nutribullet, below, using a hand blender).

For a smoother hummus, add some chickpea cooking-water, a cautious tablespoon at a time. Or add more olive oil. Blend in two batches to vary texture between smooth and whole chickpeas.

Serve with a whisper of paprika to add colour, and a trickle of olive oil. Store in the fridge for three-five days.

Good luck and let me know how you get on.

P.S. This blog on hummus is dedicated to Unreal, the UK charity for people with depersonalisation and derealisation.

Healthy grain-free fruit cake

Made for a special birthday, this recipe is a KEEPER.

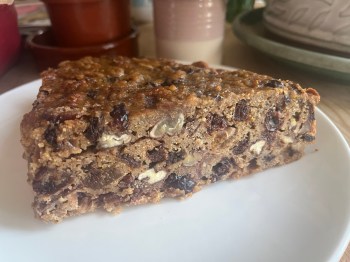
Billed as a quick and healthy Christmas cake, it is grain-free and gluten-free. It is delicious and – thanks to soaking the dried fruit – delectably moist. The five eggs make it very light and nutritious.

It requires careful weighing but apart from that, low on faff.

(And thanks to Tayda for careful weighing.).

Use dried fruit of your choice. I went for dried cranberries and sour cherries, and chopped-up dried apricots and dates. Snip with scissors, as the original recipe suggests. Saves on sticky fingers.

I used cassava flour instead of coconut flour. Cassava flour is white and neutral, and made from a root vegetable. Next time I am going to experiment with buckwheat flour because buckwheat is a plant and so less carbs than root veg. (I love buckwheat – but that is for another post).

I used ground almonds as it is equivalent to almond flour/meal. And chopped pecans (chopped walnuts or hazelnuts etc and/or a mix would also work). I did not have vanilla extract and it was fine without (otherwise add 1 teaspoon).

I did not bother glazing it as suggested – and really did not miss it.

Here is the recipe, slightly simplified for my own use.

Recipe

  • 500 grams mixed dried fruits
  • 75 grams pecans or walnuts
  • 1 orange (zest and juice)
  • 125 grams ground almonds
  • 67 grams coconut flour (or cassava or buckwheat)
  • 1/2 tsp bicarb soda
  • 1/2 tsp salt
  • 1 tsp ground cinnamon (or more!)
  • 5 eggs
  • 50 grams butter or coconut oil, melted (I used butter).

How to

  • Soak the fruit in hot boiled water for 15 mins then drain it well.
  • Line a 20 cm – 23cm cake tin
  • Preheat oven to 150 C
  • Combine the ground almonds, cassava flour, bicarb, salt, and cinnamon in a large mixing bowl.
  • Add grated orange zest and chopped nuts.
  • In a separate (smaller) bowl, whisk together the eggs, melted butter, and the squeezed orange juice from your zested orange.
  • Gradually stir in the above wet mixture INTO the DRY mixture. The cake batter is quite thick.
  • Mix in the soaked fruit with a big spoon so the fruit is well distributed. Thanks to the soaked fruit, the batter will now be less thick.
  • Spoon the cake batter in to the lined baking tin and press down with the back of a spoon to eliminate any pockets of air and level the top
  • Bake the cake for between 60 – 70 minutes, or until the centre feels firm to touch or an inserted skewer comes out dry. If it looks at risk of getting a bit burned, cover the top with parchment paper.

Thank you Monique at Nourish Everyday!

Black Forest Gateau

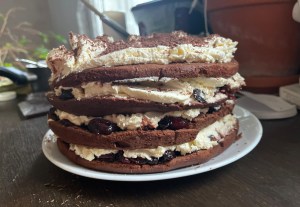
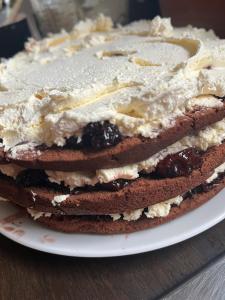
Four layered chocolate sponge cakes filled with whipped cream, and sour cherry filling and topped with whipped cream
A mission. I scoured myriad, confusing recipes looking for the most streamlined yet authentic version.

Eventually I settled on the Hairy Bikers’ recipe which has much to recommend it:

  • One-bowl food processor mix for the sponge cakes (and no beating of egg whites)
  • Two cakes sliced in two thus making four layers
  • Sour cherry jam plus the addition of dried sour cherries was a labour-saving winning filling.

My modifications on the Hairy Bikers:

  • I used 200g (not 160g) of dried sour cherries and they were unsweetened.
  • I added a tin of drained pitted black cherries from Cooks & Co.
  • I cooked the filling for about an hour (not 15 minutes) to reduce it.
  • I did not use cherry brandy. I used 6 Tablespoons of Kirsch but the taste cooked away. I question how crucial it is. The cherries do the real work. It is all about the sour cherries.
  • When it came to decorating the cake, there were no piping, nozzles or rosettes involved. Just a palette knife and lots of whipped double cream.

The most challenging part of this recipe was cutting the two cakes into half horizontally without demolishing them. A long-bladed serrated knife was crucial for the exercise. This Hairy Biker advice was also essential: “Keep the knife parallel to the work surface, to get a good even cut.”

I would add: Make sure Nothing Else is happening as you crouch over the cake, delicately sawing away.

Modified recipe

Ingredients for sponge cakes

  • 225g/8oz butter at room temperature (and extra for greasing)
  • 225g/8oz caster sugar
  • 160g/5½oz self-raising flour (or gluten-free self-raising flour)
  • 65g/2¼oz cocoa powder
  • ½ tsp baking powder
  • 4 eggs at room temperature

Ingredients for filling 

  • 340g/11¾oz jar of morello cherry jam – get a good quality one 
  • 200g/7.05 oz pack of  dried sour cherries 
  • 1 tin of drained black cherries 

Ingredients for decoration

  • 500ml/18fl oz double cream
  • 50g/2oz dark chocolate, coarsely grated.

Instructions

Make the cakes and the filling the night before and assemble all on the day.

CAKES

  • Grease 2 x 20cm/8 in loose-based sandwich tins and line bases with baking parchment.
  • Preheat the oven to 190°C/375F/Gas 5.
  • Put the butter, sugar, flour, cocoa powder, baking powder and eggs into a food processor and blend until smooth and thick. Make sure it is well blended.
  • Divide the mixture between the two cake tins
  • Bake for 20–25 minutes
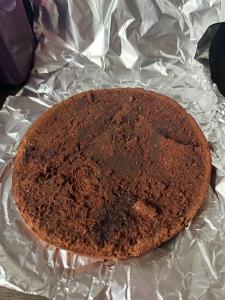
  • Remove from oven and cool for 5 minutes before turning out on to a wire rack. Take off paper. Leave cakes to cool.
  • When the cakes are cold, cut them in half, horizontally, with a long-bladed serrated knife.
  • Wrap individually in tin foil and store in cool place.


FILLING
Put the jam in a saucepan with the dried sour cherries and drained can of black cherries. Simmer gently until liquid is reduced, maybe about 1 hour. Do not let it burn.

The cake and filling can be made the day before.

ASSEMBLING CAKE

Whip the cream with an electric hand-whisk until firm.

Cover the three cake layers with cherry filling and whipped cream and sandwich together.

Top with the three filled layers with the fourth cake layer and cover with cream and sprinkle with grated dark bitter chocolate.

The blog author holding the assembled four layered black ofrest gateau


Feta cheese dip

Dear future self, I am recording this tasty, healthy recipe for posterity.
Whip (using blender/food processor/Nutribullet):

  • Bunch of watercress
  • 3 spring onions (roughly chopped)
  • 3 cloves of garlic
  • 1 packet of feta cheese
  • Lemon juice (half or whole lemon)
  • A generous glug-glug of oIive oil.

I used organic ingredients. In the mythical land of Winkler, the polluters pay which makes pesticide-sprayed food grown with chemical fertilisers far more expensive than organic.

However back on planet Earth, the polluter gets a free pass and we have to pay extra for organic.

My A.I. assistant has kindly listed the benefits (which I corrected for English spelling).

  1. Reduced Pesticide Exposure: Organic farming avoids the use of synthetic pesticides, which may reduce the risk of consuming pesticide residues.
  2. Environmental Conservation: Organic farming practices prioritise the use of natural fertilisers and crop rotation to maintain soil health and biodiversity.
  3. Animal Welfare: Organic livestock is raised without the use of antibiotics or growth hormones, potentially promoting better animal welfare.
  4. Nutritional Benefits: Some studies suggest that organic produce may contain higher levels of certain nutrients and antioxidants.

Signing off from human me.

Mince pie trifle

Tart, textured, light and fresh, this turned out to be a winner.

(Gosh, food blogs are so glossy these days. Real Food Lover does not fit that category as my pic above demonstrates).

I am here to record recipes to remember.

So here are the layers from bottom to top:

  • Mince pies (in this case, four gluten-free ones) crushed with back of a spoon with added sultanas
  • The juice from a tin of fruit cocktail (see below) in a small saucepan with 3 generous teaspoons of marmalade, a few teaspoons of sugar, lemon juice and a teaspoon of sherry boiled and bubbling until the liquid reduced; then spooned over the crushed mince pies
  • Small tin of fruit cocktail in their own juices with no added sweetness, drained
  • Plus fresh blueberries (I used frozen) for essential tartness
  • Custard (I used 400g shop-bought because ease and time were of the essence)
  • 500g double cream, whipped (NutriBullet was great for this) was the final layer. Chill in fridge.

    The time it took (A.I. suggested I add this bit and an intro. Ha. Ironic laugh): in total, it took about 30 mins to prepare, the longest bit was condensing the liquid.

    The end result was a pudding of different textures (light and crunchy from pie and fruit) and tastes (sweetness from pie and custard offset by bitter-tartness from marmalade and blueberries).

    Delicious – and easy to make. Thus, it is a keeper.


Real Food Lover has returned April 2023

Yup, I am home again.

I will celebrate my return by noting my new improved marmalade measurements.

I have it down to a fine art now:

5 lbs of Seville oranges

5 lbs of sugar

5 pts of water

(including 1pt of water and 2 lemons for pectin)

Tangy, orangey, not too sweet.

The method is here

Real Food Lover moved June 2019

Signpost at Huxhams Cross Farm

Real Food Lover has moved to a new address Real Food Lover.net

See you there for more recipes and chats about sustainable, ecological ways to produce food in ways that are healthy for the soil, air, wildlife, farm animals and humans.

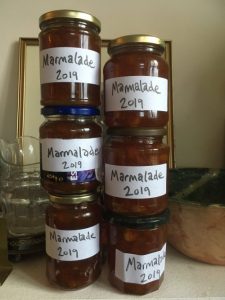
Marmalade 2019

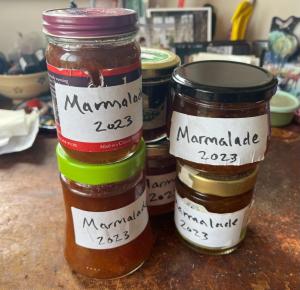
Labelled home-made marmalade jars

Winter’s Seville oranges season is over so this is for next winter’s marmalade (by which time the world will no longer be possessed by divide-and-rule politics and the UK has reversed extreme poverty described by the UN Special Rapporteur). 

This ratio of oranges to sugar works well. Not too sweet. Excellent jelly-like consistency. A keeper.

3lbs Seville oranges 
3lbs 12oz sugar
4pts water
1 pt water for pectin
2 lemons for pectin

My trusted slightly-edited marmalade recipe, which I owe to the late Katie Stewart, the Times cookery writer, is below. Beg or borrow a preserving pan.* Otherwise, use a pan deep enough for the marmalade to boil safely, and wide enough to allow a large surface to evaporate.

Top Katie Tips

  • Place a saucer or two in freezer or fridge to encourage hot marmalade to cool quickly when testing it has set
  • Put sugar (already weighed) in a pan in low oven to warm which will speed up boiling time
  • Clean jars thoroughly with hot water and dry them in oven.

Five stages of making marmalade

Stage 1 Clean oranges and simmer to soften

  • Scrub Seville oranges and remove stalks (organic oranges are worth it because better farming creates more taste and health)
  • Use your largest pan or two smaller ones with lids 
  • Fill with 4 pints of water and simmer oranges for about an hour until peel is soft (orangey aroma will fill room)
  • Drain cooked oranges and reserve cooking water – a precious liquid that becomes marmalade. 

So far, this process can be done earlier, or the day before.

Stage 2 Extracting pith and pips for pectin

Pectin, extracted from the insides of the fruit, is the setting agent.

  • Cut cooked-and-cooled oranges in half.
  • Scoop-out their insides – the pitch-and-the pips – with a spoon 
  • Add pith-and-pips to a large-enough pan with the additional 1 pint of water and 2 lemons cut in half.
  • Simmer for ten minutes then drain and reserve.

This pectin-rich liquid will be used in Stage 4.

Stage 3 Slicing peel
Flatten softened peel, and cut up peel of oranges (and the 2 lemons) with a small sharp knife as thinly/thickly as you like.

Stage 4 Rolling boiling 
Take the warmed sugar from the oven. It should be in a preserving pan or largest pans (see above*)

Add the precious orange water (Stage 1), drained pectin-juice (Stage 2), and cut-up peel (Stage 3) in with sugar into preserving pan.

Start boiling.

It takes about 20-30 minutes to get the whole pan boiling and it is after that, you must watch like a hawk for the (ta-da) rolling boil.

Overboiling at this stage can stop the marmalade setting. So timing the rolling boil is important. After 15 minutes of a rolling boil, take the pan off the heat.

A rolling boil is when the marmalade is not just bubbling but is a fast-boiling glucky furious whirl. 

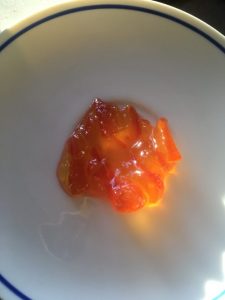
Marmalade looking jewel-like in the light

Test for a set
Drop a spot of hot jam on one of those icy-cold plates
Let droplet cool, tilting plate to encourage cooling, then push droplet gently with your finger. You are looking for tell-tale wrinkles and jelly-like character. (The opposite to the lead in a romantic movie).

If the droplet is runny, boil again for a few minutes then test again. And so on until the test droplets are unequivocally set.

Stage 5 Marmalade in jars
Let jam cool in pan until not-too-hot yet not too-set for pouring.
Next, is the sticky bit so spread newspaper over kitchen surfaces, and use a ladle or a jug to pour the warm marmalade carefully into clean jars.

Recipes often say use waxed discs to keep out condensation and mould but, cutting-corners-cook that I am, I have not done so for years, with no adverse effects. 

Wipe jars from stickiness and proudly label.

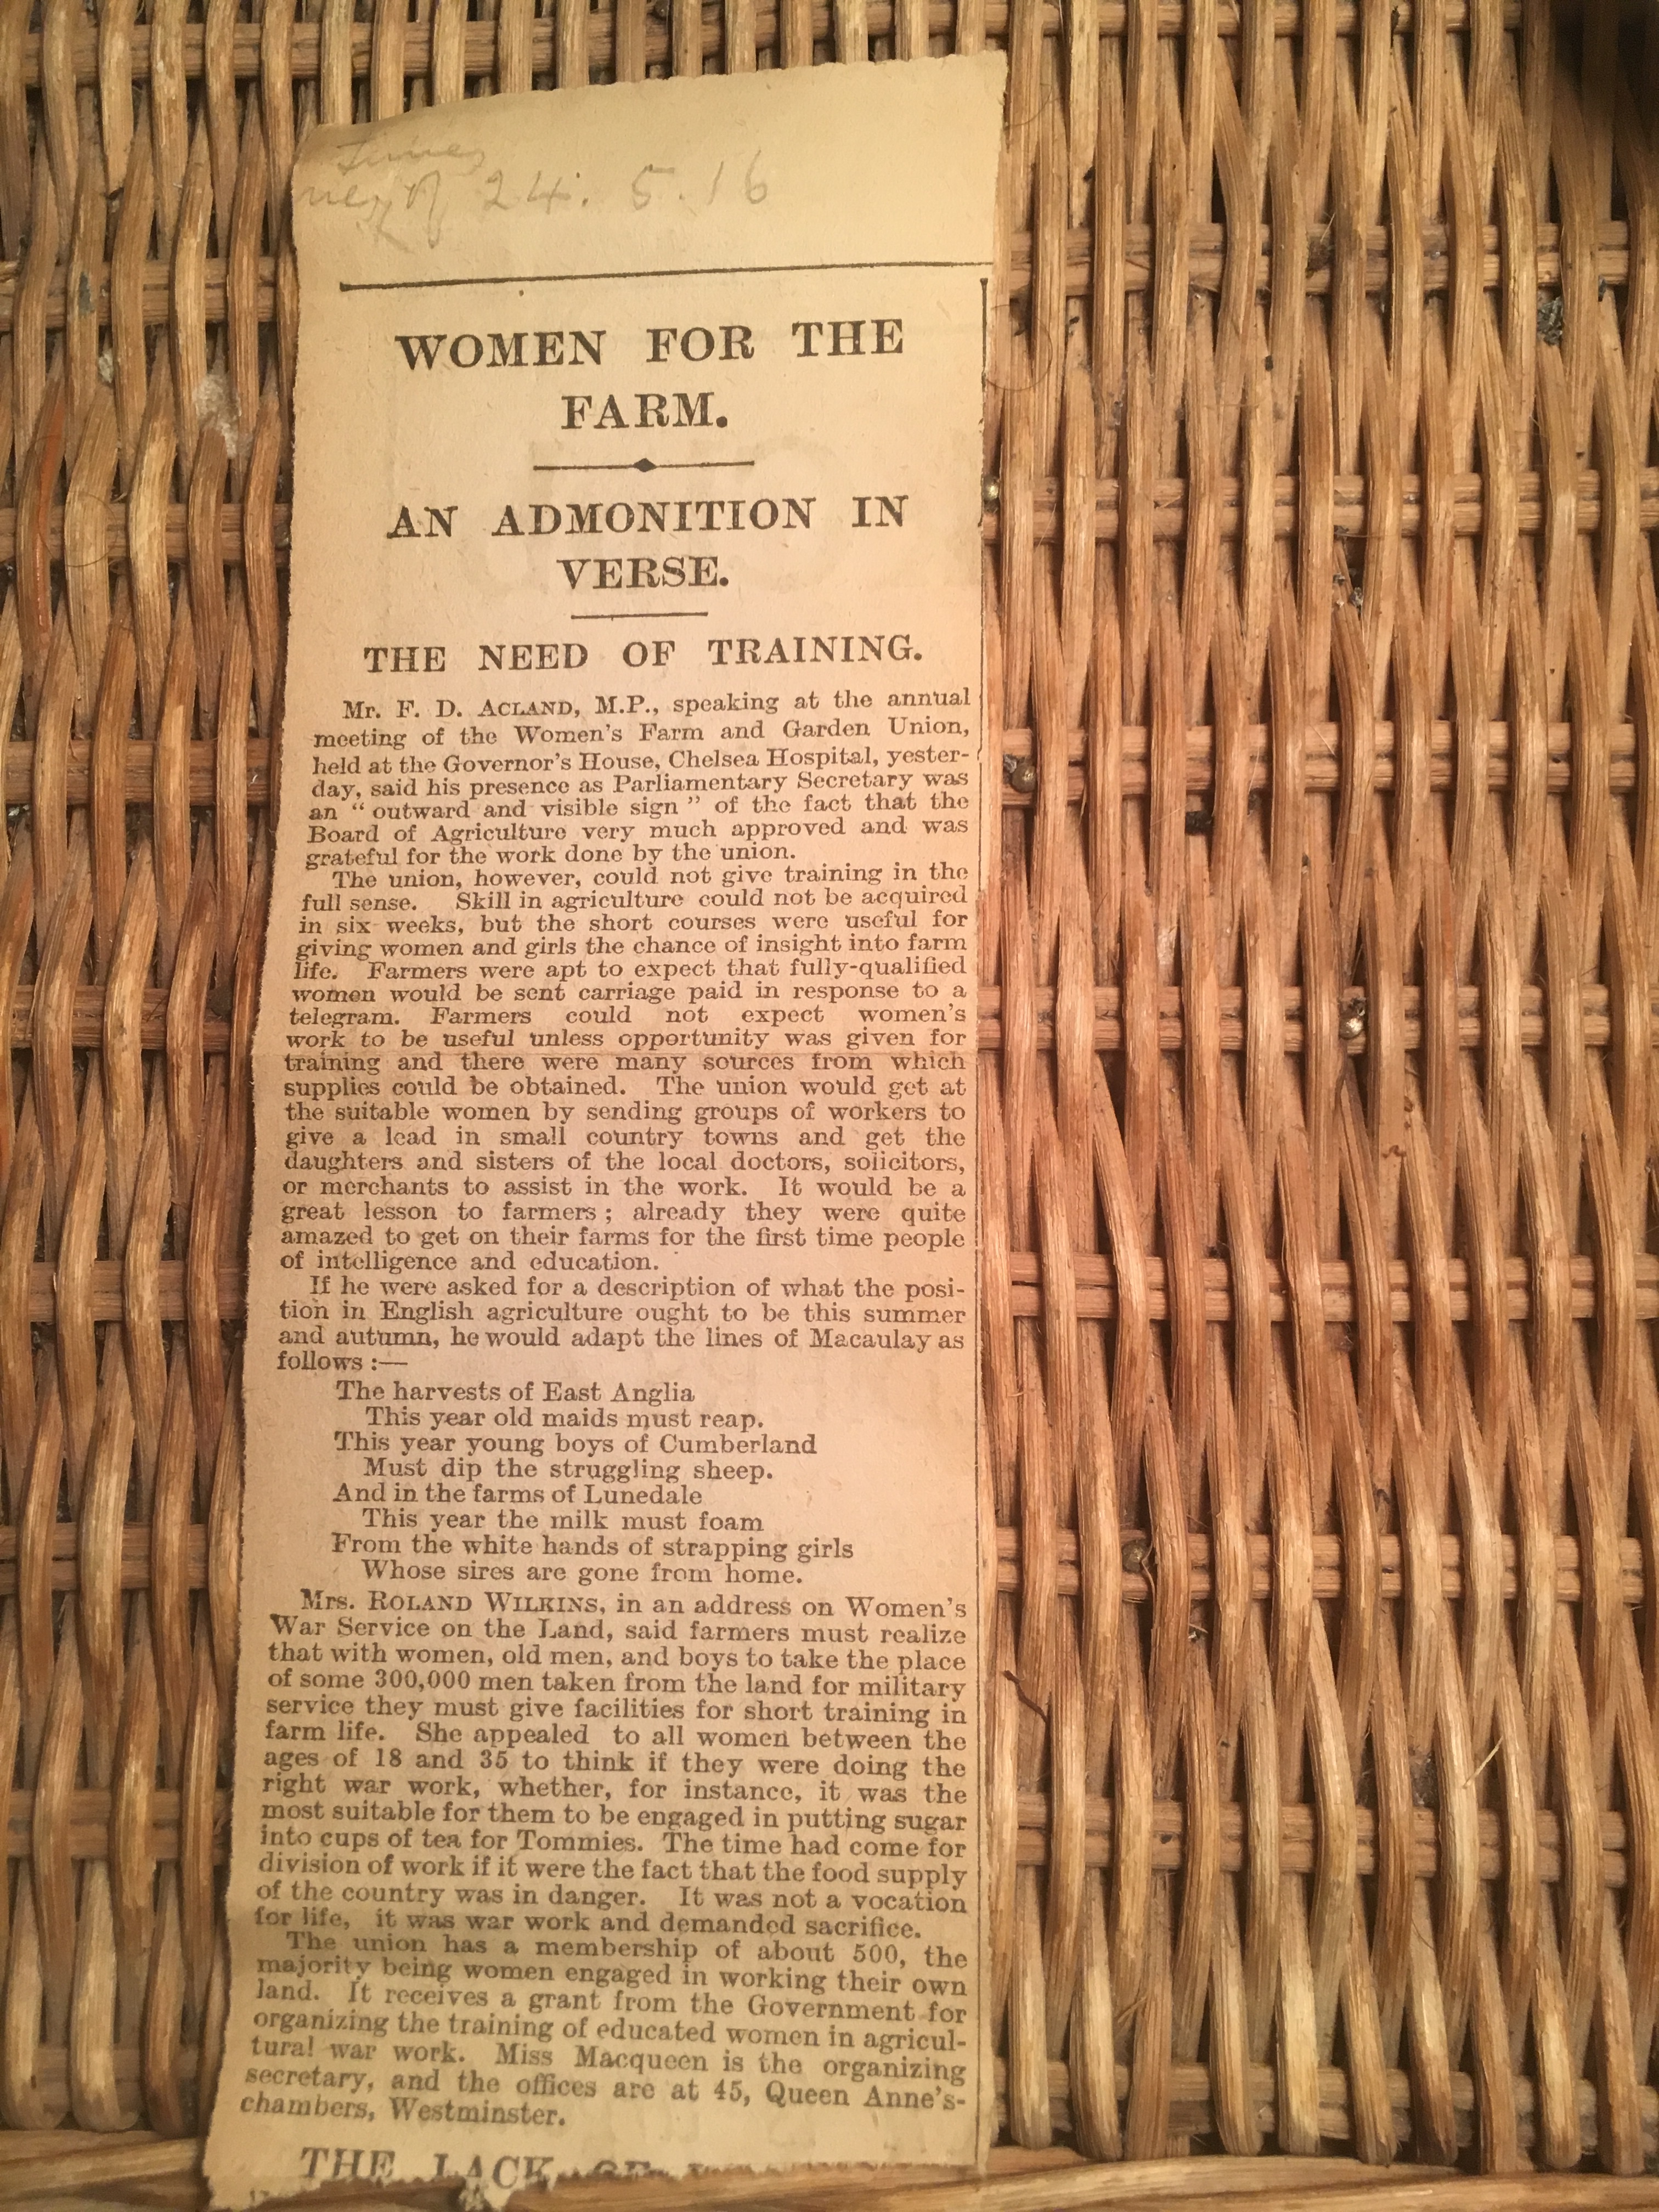
1916 Women’s Farm and Garden Union

1916 newspaper cutting on origins of Women's Land Army
A cutting on the precursor to the Women’s Land Army

The yellowed newspaper cutting flutters down as we are packing up old books.

As if it has a message for me – its headline: Women for the farm.

At the top, in a pencilled scrawl, The Times, and the date: 24.5.16 

The cutting concerns the annual meeting of the Women’s Farm and Garden Union at Chelsea Hospital, London, midway through the First World War (1914 – 1918). 

According to the cutting, the Women’s Farm and Garden Union has a membership of about 500, the majority being women working their own land.

Parliamentary Secretary to the Board of Agriculture and Fisheries, FD Acland MP, attends. 

His presence is “an outward and visible sign” of the Board of Agriculture’s approval and gratitude for the Women’s Farm and Garden Union work.

A historic moment…

…As I discover from the Museum of English Rural Life at Reading University because, the following year, the Women’s Farm and Garden Union is taken over by the Board of Agriculture, and becomes the first Women’s Land Army.

The Women’s Land Army has been rediscovered in recent years. 

Usually, attention is focused on its activities during the Second World War [pic above].

My newspaper cutting points to its role during the First World War.

Acland, a Liberal MP influential in setting up the Forestry Commission, according to his Wikipedia entry, adapts a poem from Macaulay (the British historian and politician, Macaulay?) to describe the farm work of women and men too young or old to serve working the land in the absence of men at war.

The newspaper editor subtitles the piece “an admonition in verse.” Yet Acland is not criticising the women but praising them.

The newspaper quotes the politician’s ditty:

“The harvests of East Anglia
   This year old maids must reap
This year young boys of Cumberland
     Must dip the struggling sheep.
And in the farms of Lunedale
   This year the milk must form
From the white hands of strapping girls
  Whose sires are gone from home.”

Mrs Roland Wilkins also addresses the Women’s Farm and Garden Union:  the work of women, old men and boys are replacing that of some 300,000 men taken from the land for military service.

Mrs Roland Wilkins makes an acerbic (as I read it) comment on how women’s war effort may be better served on the land than “putting sugar in cups of teas  for Tommies.” 

Indeed.

Fast forward to 2018. According to the Food and Agriculture United Nations (FAO), women feed the world.  They produce more than half of all the food grown globally.

In rural areas – home to the majority of the world’s hungry – they grow most of the crops for domestic consumption and are primarily responsible for preparing, storing and processing food. They also handle livestock, gather food, fodder and fuelwood and manage the domestic water supply. In addition, they provide most of the labour for post-harvest activities. Yet women’s work often goes unrecognized, and they lack the leverage necessary to gain access to resources, training and finance. 

A point also made at the photographic exhibition, We Feed The World [image below]. 

Women farmers from Todjedi, Benin. Photo for WFTW by Fabrice Monteiro

Women farmers from Todjedi, Benin. Image: Fabrice Monteiro

A big shout-out to women farmers of the past, the future and everywhere on the planet.

google4f6014e813d6053b.html


<a href="https://www.bloglovin.com/blog/912305/?claim=96ayceaxu6y">Follow my blog with Bloglovin</a>